Channels allow you to create private or public groups where you can send messages, files, images, and start an instant meeting with channel members. These channels generally serve as longer-term collaboration forums, such as specific teams, channels serving a specific purpose or topic (Ask IT, for example), and announcement channels.
Private channels cannot be searched for and found by users who are not already a member of the channel; current members of the channel must add those other members to give them access.
Public channels are searchable and joinable by all members of an account, and all members of that account need no special invitation to join, but they can be added to the channel by current members as well. Public channels are specific to an account and cannot be found by external users, but external contacts can be added to a channel if allowed by admins.
Learn about other channel management options.
Prerequisites for chat channels
Joining and using chat channels:
- Zoom desktop client for Windows, macOS, or Linux: Global minimum version or higher
- Zoom mobile app for Android or iOS: Global minimum version or higher
- Zoom Web App
Previewing channels before joining:
- Zoom desktop client for Windows, macOS, or Linux: Global minimum version or higher
- Zoom mobile app for Android or iOS: Global minimum version or higher
- Advanced chat encryption disabled
Limitations of Zoom Team Chat channels
- Public channels can have up to 10,000 members.
Note: Account admins can request Zoom increase the capacity of public channels to 50,000 members. - Private channels on paid accounts can have up to 5000 members, while private channels on free accounts can have up to 500 members.
 Windows |
  macOS
macOSHow to view and join channels
- Sign in to the Zoom desktop client.
- Click the Team Chat tab
 to see a list of channels, group chats, chat folders, and 1:1 conversations you currently belong to.
The chat list will indicate if a channel is public or private
  , while 1:1 chats will show the user's profile picture or initials.
 - At the top of the panel, click the down arrow icon
 next to Team Chat, and click Join a Channel.
A window will appear with a list of channels you can join or search for a specific channel.
- Use the search bar to find a channel.
Hovering your cursor over the channel names provides the following options:- Preview: View more information about the channel, including channel description, members, and recent messages (if previous messages are allowed to be viewed by new channel members). Click Join Channel to join the channel, or Close to exit this preview.
- Join: Immediately join the selected channel.
How to create a new chat channel
If a chat channel suiting your needs doesn’t exist, you can easily create a new channel specific to your needs.
- Sign in to the Zoom desktop client.
- Click the Team Chat tab .
- At the top of the panel, click the down arrow next to Team Chat, and click Create a Channel.
Note: If this option is grayed out, your account admin has prevented your group from adding channels. - Enter the following required details to create a new channel:
- Channel Name: Enter a display name to help others identify your channel.
- Channel Type: Select the channel type.
- Public: Anyone in your organization can join your channel.
- Private: Only invited people can join your channel.
Note: If one of these options is grayed out, your account admin has prevented your group from creating that type of channel.
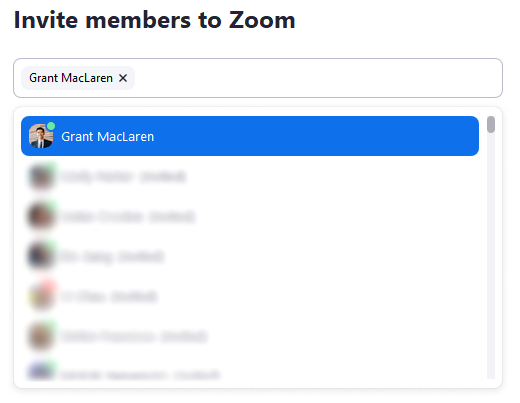
- Add Members: Enter a name to search for contacts, then click the name to add them to the invite list.
Note: You can invite individual users, or you can select an existing channel to invite all members of that channel. You must be a member of the channel to invite all of its members. Inviting all members of a channel is only available for Windows and macOS. - Advanced Permissions: Click to view additional channel permissions.
- Who can add members:
- Everyone: Any channel members can add additional users.
- Owner and admins only: Only the channel owner and any designated channel admins can add additional users.
- External users can be added: If checked, users not in your organization can be added to the channel.
Note: If you enable this option, make sure to review the channel privileges of external users.- By all channel members: Members internal and external to your organization can add external members.
- By members in your organization: Only members internal to your organization can add external members.
- Only by the channel owner and admins: Only the channel owner and any designated channel admins can add additional external users.
- Who can send messages: Select which channel members are allowed to post in the channel.
- Everyone: All channel members can post in the channel.
- Owner and admins, plus specific people: Only the channel owner, designated admins, and specified members can post in the channel.
- Owner and admins only: Only the channel owner and designated admin can post in the channel.
- Who can use @all: Select which channel members are allowed to use the @all mention in the channel.
- Everyone: All channel members can use the @all mention in the channel.
- Owner and admins only: Only the channel owner and designated admin can use the @all mention in the channel.
- Disable @all for this channel: Disable the use of the @all mention for this channel. Use of @ mentions for specific users or defined mention groups, are unaffected.
- Who can add members:
- Click Create Channel.
Edit a channel's name and settings
If you're the channel admin, you can customize the channel's name and privacy settings.
- Sign in to the Zoom desktop client.
- Click the Team Chat tab , then select a channel in the left-side panel.
- In the top-right corner, click More Actions
 .
. - Click More Options to open that menu and select Edit Channel.
- You can change the following channel settings:
- Channel Name: Enter a display name to help others identify your channel.
- Channel Type: Select the channel type.
- Public: Anyone in your organization can join your channel.
- Private: Only invited people can join your channel.
- Message and File History: Choose if new members of the channel are able to see messages and shared files from before they joined the channel.
- Advanced Permissions: Click to view additional channel permissions.
- Who can add members:
- Everyone: Any channel members can add additional users.
- Owner and admins only: Only the channel owner and any designated channel admins can add additional users.
- External users can be added: If checked, users not in your organization can be added to the channel.
Note: If you enable this option, make sure to review the channel privileges of external users.- By all channel members: Members internal and external to your organization can add external members.
- By members in your organization: Only members internal to your organization can add external members.
- Only by the channel owner and admins: Only the channel owner and any designated channel admins can add additional external users.
- Who can send messages: Select which channel members are allowed to post in the channel.
- Everyone: All channel members can post in the channel.
- Owner and admins, plus specific people: Only the channel owner, designated admins, and specified members can post in the channel.
- Owner and admins only: Only the channel owner and designated admin can post in the channel.
- Who can use @all: Select which channel members are allowed to use the @all mention in the channel.
- Everyone: All channel members can use the @all mention in the channel.
- Owner and admins only: Only the channel owner and designated admin can use the @all mention in the channel.
- Disable @all for this channel: Disable the use of the @all mention for this channel. Use of @ mentions for specific users or defined mention groups, are unaffected.
- Who can add members:
- Click Save Changes.
Edit a channel's description
The channel description provides a brief explanation to help users identify the channel and its purpose.
Note: You can only change posting permission in the Windows and macOS clients.
- Sign in to the Zoom desktop client.
- Click the Team Chat tab , then select a channel in the left-side panel.
- In the top-right corner, click More Actions .
- At the top of the panel, click Add a channel description (if none currently exists) or Edit (if a description has already been added).
Invite additional members to a channel
After the initial creation of the channel, where the admin invited the first batch of members, others can be added to a channel by current members.
- Sign in to the Zoom desktop client.
- Click the Team Chat tab .
- Click the channel you want to invite members to.
- In the top-right corner, click More Actions .
- Next to the Members section, click the plus button
 .
.
A window will appear to search for and add members. - Use the search box to search for users, select one or more users you want to invite.
- Click Add to confirm the additions.
Notes:- You can invite individual users, or you can select an existing channel to invite all members of that channel. You must be a member of the channel to invite all of its members.
- You can also copy-and-paste email addresses to add contacts in bulk.
- You can invite external Zoom users if allowed by the channel admin. Make sure to review the channel privileges of external users before you invite them.
How to star a channel
You can put a star on important channels, placing them under Starred in your chat panel and allowing you to quickly view them later on.
- Sign in to the Zoom desktop client.
- Click the Team Chat tab .
- Select the channel you want to star.
- At the top left of the channel window, click the star icon
 .
.
The starred channel will appear in the Starred section of the chat panel.
For more detailed organization of 1:1 chats, group chats, and channels, you can also create folders.
Information regarding external contacts
Users added to your contact list, who are not on the same account as yours, will be labeled as External.
For a 1:1 chat with that contact, External will be listed to their name at the top of the chat window:
For a group chat, External will be listed next to the name of any participants who are not a part of the account:
When composing a message in a channel with external users present, a notification above the compose box will appear, warning there are 1 or more external users present in the group chat or channel.
Details on how channels are ordered in the chat panel
Channels on the desktop client can be organized by sections (folders, 1:1 and group chats, channels, meeting chats, etc), or organized by folders, with those not assigned to a folder being listed under Recents.
With either organization, channels are listed dynamically based on last modification or notification. This means when a channel receives a new notification it is moved to the top of the list in that section. This behavior can be changed through the Organize by section and Keep all unread messages on top in chat and channel lists settings on the desktop client.
Folder organization
Group chats, 1:1s, and other channels within a folder are listed by when they were added to the folder, unless manually re-ordered. Any new channels added to a folder are added to the bottom of the list.
 Linux
LinuxHow to view and join channels
- Sign in to the Zoom desktop client.
- Click the Team Chat tab to see a list of channels, group chats, chat folders, and 1:1 conversations you currently belong to.
The chat list will indicate if a channel is public or private , while 1:1 chats will show the user's profile picture or initials. - Hover your cursor over the Recents chat category, click the more button
 , and then select Join a Channel.
A window will appear with a list of channels you can join or search for a specific channel. - Use the search bar to find a channel.
Hovering your cursor over the channel names provides the following options:- Preview: View more information about the channel, including channel description, members, and recent messages (if previous messages are allowed to be viewed by new channel members). Click Join Channel to join the channel, or Close to exit this preview.
Note: This preview is only available for public channels. - Join: Immediately join the selected channel.
- Preview: View more information about the channel, including channel description, members, and recent messages (if previous messages are allowed to be viewed by new channel members). Click Join Channel to join the channel, or Close to exit this preview.
How to create a new chat channel
If a chat channel suiting your needs doesn’t exist, you can easily create a new channel specific to your needs.
- Sign in to the Zoom desktop client.
- Click the Team Chat tab .
- Hover your cursor over the Recents chat category, click the ellipsis button .
- Select Create a Channel
Note: If this option is grayed out, your account admin has prevented your group from adding channels. - Enter the following required details to create a new channel:
- Channel Name: Enter a display name to help others identify your channel.
- Channel Type: Select the channel type.
- Public: Anyone in your organization can join your channel.
- Private: Only invited people can join your channel.
Note: If one of these options is grayed out, your account admin has prevented your group from creating that type of channel.
- Add Members: Enter a name to search for contacts, then click the name to add them to the invite list.
Note: You can invite individual users, or you can select an existing channel to invite all members of that channel. You must be a member of the channel to invite all of its members. Inviting all members of a channel is only available for Windows and macOS. - Advanced Permissions: Click to view additional channel permissions.
- Who can add members:
- Everyone: Any channel members can add additional users.
- Owner and admins only: Only the channel owner and any designated channel admins can add additional users.
- External users can be added: If checked, users not in your organization can be added to the channel.
Note: If you enable this option, make sure to review the channel privileges of external users.- By all channel members: Members internal and external to your organization can add external members.
- By members in your organization: Only members internal to your organization can add external members.
- Only by the channel owner and admins: Only the channel owner and any designated channel admins can add additional external users.
- Who can send messages: Select which channel members are allowed to post in the channel.
- Everyone: All channel members can post in the channel.
- Owner and admins, plus specific people: Only the channel owner, designated admins, and specified members can post in the channel.
- Owner and admins only: Only the channel owner and designated admin can post in the channel.
- Who can use @all: Select which channel members are allowed to use the @all mention in the channel.
- Everyone: All channel members can use the @all mention in the channel.
- Owner and admins only: Only the channel owner and designated admin can use the @all mention in the channel.
- Disable @all for this channel: Disable the use of the @all mention for this channel. Use of @ mentions for specific users or defined mention groups, are unaffected.
- Who can add members:
- Click Create Channel.
Edit a channel's name and settings
If you're the channel admin, you can customize the channel's name and privacy settings.
- Sign in to the Zoom desktop client.
- Click the Team Chat tab , then select a channel in the left-side panel.
- In the top-right corner, click More Actions .
- Click More Options to open that menu and select Edit Channel.
- You can change the following channel settings:
- Channel Name: Enter a display name to help others identify your channel.
- Channel Type: Select the channel type.
- Public: Anyone in your organization can join your channel.
- Private: Only invited people can join your channel.
- Message and File History: Choose if new members of the channel are able to see messages and shared files from before they joined the channel.
- Advanced Permissions: Click to view additional channel permissions.
- Who can add members:
- Everyone: Any channel members can add additional users.
- Owner and admins only: Only the channel owner and any designated channel admins can add additional users.
- External users can be added: If checked, users not in your organization can be added to the channel.
Note: If you enable this option, make sure to review the channel privileges of external users.- By all channel members: Members internal and external to your organization can add external members.
- By members in your organization: Only members internal to your organization can add external members.
- Only by the channel owner and admins: Only the channel owner and any designated channel admins can add additional external users.
- Who can send messages: Select which channel members are allowed to post in the channel.
- Everyone: All channel members can post in the channel.
- Owner and admins, plus specific people: Only the channel owner, designated admins, and specified members can post in the channel.
- Owner and admins only: Only the channel owner and designated admin can post in the channel.
- Who can use @all: Select which channel members are allowed to use the @all mention in the channel.
- Everyone: All channel members can use the @all mention in the channel.
- Owner and admins only: Only the channel owner and designated admin can use the @all mention in the channel.
- Disable @all for this channel: Disable the use of the @all mention for this channel. Use of @ mentions for specific users or defined mention groups, are unaffected.
- Who can add members:
- Click Save Changes.
Edit a channel's description
The channel description provides a brief explanation to help users identify the channel and its purpose.
- Sign in to the Zoom desktop client.
- Click the Team Chat tab , then in the left-side panel, select a channel.
- In the top-right corner, click More Actions .
- At the top of the panel, click the edit pencil icon
 to provide or edit the description.
 - Click Save to confirm the changes.
Invite additional members to a channel
After the initial creation of the channel, where the admin invited the first batch of members, others can be added to a channel by current members.
- Sign in to the Zoom desktop client.
- Click the the Team Chat tab .
- Click the channel you want to invite members to.
- In the top-right corner, click More Actions .
- Next to the Members section, click the plus button .
A window will appear to search for and add members. - Use the search box to search for users, select one or more users you want to invite.
- Click Add to confirm the additions.
Notes:- For the Linux client, you can only invite individual users.
- You can also copy-and-paste email addresses to add contacts in bulk.
- You can invite external Zoom users if allowed by the channel admin. Make sure to review the channel privileges of external users before you invite them.
How to star a channel
You can put a star on important channels, placing them under Starred in your chat panel and allowing you to quickly view them later on.
- Sign in to the Zoom desktop client.
- Click the the Team Chat tab .
- Select the channel you want to star.
- At the top left of the channel window, click the star icon .
The starred channel will appear in the Starred section of the chat panel.
For more detailed organization of 1:1 chats, group chats, and channels, you can also create folders.
Information regarding external contacts
Users added to your contact list, who are not on the same account as yours, will be labeled as External.
For a 1:1 chat with that contact, External will be listed to their name at the top of the chat window:
For a group chat, External will be listed next to the name of any participants who are not a part of the account:
When composing a message in a channel with external users present, a notification above the compose box will appear, warning there are 1 or more external users present in the group chat or channel.
Details on how channels are ordered in the chat panel
Channels on the desktop client can be organized by sections (folders, 1:1 and group chats, channels, meeting chats, etc), or organized by folders, with those not assigned to a folder being listed under Recents.
With either organization, channels are listed dynamically based on last modification or notification. This means when a channel receives a new notification it is moved to the top of the list in that section. This behavior can be changed through the Organize by section and Keep all unread messages on top in chat and channel lists settings on the desktop client.
Folder organization
Group chats, 1:1s, and other channels within a folder are listed by when they were added to the folder, unless manually re-ordered. Any new channels added to a folder are added to the bottom of the list.
 Zoom Web App
How to create a new chat channel
You can easily create a new channel specific to your needs.
- Sign in to the Zoom Web App.
- Click the the Team Chat tab .
- To the right of the Channels section, click the ellipsis button and then Create a Channel.
Note: If this option is grayed out, your account admin has prevented your group from adding channels. - Enter the following required details to create a new channel:
- Channel Name: Enter a display name to help others identify your channel.
- Channel Type: Select the channel type.
- Public: Anyone in your organization can join your channel.
- Private: Only invited people can join your channel.
Note: If one of these options is grayed out, your account admin has prevented your group from creating that type of channel.
- Add Members: Enter a name to search for contacts, then click the name to add them to the invite list.
Note: You can invite individual users, or you can select an existing channel to invite all members of that channel. You must be a member of the channel to invite all of its members. Inviting all members of a channel is only available for Windows and macOS. - Advanced Permissions: Click to view additional channel permissions.
- Who can add members:
- Everyone: Any channel members can add additional users.
- Owner and admins only: Only the channel owner and any designated channel admins can add additional users.
- External users can be added: If checked, users not in your organization can be added to the channel.
Note: If you enable this option, make sure to review the channel privileges of external users.- By all channel members: Members internal and external to your organization can add external members.
- By members in your organization: Only members internal to your organization can add external members.
- Only by the channel owner and admins: Only the channel owner and any designated channel admins can add additional external users.
- Who can send messages: Select which channel members are allowed to post in the channel.
- Everyone: All channel members can post in the channel.
- Owner and admins, plus specific people: Only the channel owner, designated admins, and specified members can post in the channel.
- Owner and admins only: Only the channel owner and designated admin can post in the channel.
- Who can add members:
- Click Create Channel.
Edit a channel's name and settings
If you're the channel admin, you can customize the channel's name and privacy settings.
- Sign in to the Zoom Web App.
- Click the Team Chat tab , then select a channel in the left-side panel.
- In the top-right corner, click More Actions .
- Click More Options to open that menu and select Edit Channel.
- You can change the following channel settings:
- Channel Name: Enter a display name to help others identify your channel.
- Channel Type: Select the channel type.
- Public: Anyone in your organization can join your channel.
- Private: Only invited people can join your channel.
- Advanced Permissions: Click to view additional channel permissions.
- Who can add members:
- Everyone: Any channel members can add additional users.
- Owner and admins only: Only the channel owner and any designated channel admins can add additional users.
- External users can be added: If checked, users not in your organization can be added to the channel.
Note: If you enable this option, make sure to review the channel privileges of external users.- By all channel members: Members internal and external to your organization can add external members.
- By members in your organization: Only members internal to your organization can add external members.
- Only by the channel owner and admins: Only the channel owner and any designated channel admins can add additional external users.
- Who can send messages: Select which channel members are allowed to post in the channel.
- Everyone: All channel members can post in the channel.
- Owner and admins, plus specific people: Only the channel owner, designated admins, and specified members can post in the channel.
- Owner and admins only: Only the channel owner and designated admin can post in the channel.
- Who can add members:
- Click Save Changes.
Invite additional members to a channel
After the initial creation of the channel, where the admin invited the first batch of members, others can be added to a channel by current members.
- Sign in to the Zoom Web App.
- Click the Team Chat tab .
- Click the channel you want to invite members to.
- In the top-right corner, click More Actions .
- Next to the Members section, click the plus button .
A window will appear to search for and add members. - Use the search box to search for users, select one or more users you want to invite.
- Click Add to confirm the additions.
Note: You can invite external Zoom users if allowed by the channel admin. Make sure to review the channel privileges of external users before you invite them.
How to star a channel
You can put a star on important channels, placing them under STARRED in your chat panel and allowing you to quickly view them later on.
- Sign in to the Zoom Web App.
- Click the Team Chat tab .
- Select the channel you want to star.
- At the top left of the channel window, click the star icon .
The starred channel will appear in the Starred section of the chat panel.
For more detailed organization of 1:1 chats, group chats, and channels, you can also create folders.
Details on how channels are ordered in the chat panel
Channels on the desktop client can be organized by sections (folders, 1:1 and group chats, channels, meeting chats, etc), or organized by folders, with those not assigned to a folder being listed under Recents.
With either organization, channels are listed dynamically based on last modification or notification. This means when a channel receives a new notification it is moved to the top of the list in that section. This behavior can be changed through the Organize by section and Keep all unread messages on top in chat and channel lists settings on the desktop client.
Folder organization
Group chats, 1:1s, and other channels within a folder are listed by when they were added to the folder, unless manually re-ordered. Any new channels added to a folder are added to the bottom of the list.
 Android |
 How to view and join channels
- Sign in to the Zoom mobile app.
- Tap the Contacts tab
 .
. - At the top of the screen, Tap the Channels section to see a list of channels you currently belong to.

- In the top-right corner, tap the plus icon + and then tap on Join a Channel.
- Use the search bar to find a public channel.
Note: To join a private channel, you must be added to that channel by an existing member. Private channels cannot be searched for and joined.
- Tap the channel to view more information about the channel, including channel description, members, and recent messages (if previous messages are allowed to be viewed by new channel members).
Note: This preview is only available for public channels. - Tap Join Channel to continue joining the channel.
How to create a new channel
If a chat channel suiting your needs doesn’t exist, you can easily create a new channel specific to your needs.
- Sign in to the Zoom mobile app.
- Tap the Contacts tab .
- In the top-right corner, tap the plus icon + and then tap Create a New Channel.
Note: If this option is grayed out, your account admin has prevented your group from adding channels. - Enter the required information to create a new channel:
- Channel Name: Enter a display name to help others identify your channel.
- Channel type: Select the privacy setting for your channel:
- Private: Only invited people can join your channel.
- Public: Anyone in your organization can join your channel.
- Advanced Permissions: Click to view additional channel permissions.
- Who can add members:
- Everyone: Any channel members can add additional users.
- Owner and admins only: Only the channel owner and any designated channel admins can add additional users.
- External users can be added: If checked, users not in your organization can be added to the channel.
Note: If you enable this option, make sure to review the channel privileges of external users.- By all channel members: Members internal and external to your organization can add external members.
- By members in your organization: Only members internal to your organization can add external members.
- Only by the channel owner and admins: Only the channel owner and any designated channel admins can add additional external users.
- Who can send messages: Select which channel members are allowed to post in the channel.
- Everyone: All channel members can post in the channel.
- Owner and admins, plus specific people: Only the channel owner, designated admins, and specified members can post in the channel.
- Owner and admins only: Only the channel owner and designated admin can post in the channel.
- Who can add members:
- Click Next.
- Use the chat compose box to search for members, select the members you want to invite, then click OK.
Edit a channel's name and settings
If you created a channel, you can change its name and change channel privacy settings.
- Sign in to the Zoom mobile app.
- Open the channel you want to edit, either through the Team Chat tab or the Contacts tab.
- In the top right corner, tap the info icon
 .
. - Tap Channel Name to edit the display name and help others identify your channel.
- Tap More Options to access additional settings
- Channel type: Select the privacy setting for your channel:
- Private: Only invited people can join your channel.
- Public: Anyone in your organization can join your channel.
- New members will see previous messages and files: Choose if new members of the channel are able to see messages and shared files from before they joined the channel.
- Assign New Owner: Allows a channel owner to assign another user the ownership of this channel.
- Advanced Permissions: Click to view additional channel permissions.
- Who can add members:
- Everyone: Any channel members can add additional users.
- Owner and admins only: Only the channel owner and any designated channel admins can add additional users.
- External users can be added: If checked, users not in your organization can be added to the channel.
Note: If you enable this option, make sure to review the channel privileges of external users.- By all channel members: Members internal and external to your organization can add external members.
- By members in your organization: Only members internal to your organization can add external members.
- Only by the channel owner and admins: Only the channel owner and any designated channel admins can add additional external users.
- Who can send messages: Select which channel members are allowed to post in the channel.
- Everyone: All channel members can post in the channel.
- Owner and admins, plus specific people: Only the channel owner, designated admins, and specified members can post in the channel.
- Owner and admins only: Only the channel owner and designated admin can post in the channel.
- Who can use @all: Select which channel members are allowed to use the @all mention in the channel.
- Everyone: All channel members can use the @all mention in the channel.
- Owner and admins only: Only the channel owner and designated admin can use the @all mention in the channel.
- Disable @all for this channel: Disable the use of the @all mention for this channel. Use of @ mentions for specific users or defined mention groups, are unaffected.
- Who can add members:
- Channel type: Select the privacy setting for your channel:
Edit a channel's description
The channel description provides a brief explanation to help users identify the channel and its purpose.
- Sign in to the Zoom mobile app.
- Tap the Contacts tab .
- Open the channel you want to edit, either through the Team Chat tab or the Contacts tab.
- Tap the channel you want to edit.
- In the top right corner, tap the info icon .
- Tap Description, and then provide or edit the description.
- Tap Save to confirm the changes.
Invite members to a channel
After the initial creation of the channel, where the admin invited the first batch of members, others can be added to a channel by current members.
- Sign in to the Zoom mobile app.
- Open the channel you want to add more members to, either through the Team Chat tab or the Contacts tab.
- In the top-right corner, tap the info icon .
- Tap Add Members.
- Search for contacts, select the contacts you want to invite, then click OK.
Notes:- You can invite individual users, or you can select an existing channel to invite all members of that channel. You must be a member of the channel to invite all of its members.
- You can invite external Zoom users if allowed by the channel admin. Make sure to review the channel privileges of external users before you invite them.
How to star a channel
You can put a star on important channels, placing them under Starred in your chat panel and allowing you to quickly view them later on.
- Sign in to the Zoom mobile app.
- Open the channel you want to star, either through the Team Chat tab or the Contacts tab.
- Beside the channel name, tap the info icon .
- In the top right, click the star icon .
The starred channel will appear in the Starred section at the top of your channels list.
Information regarding external contacts
Users added to your contact list, who are not on the same account as yours, will be labeled as External in contacts.
The External label will also show on the profile picture of the contact when tapping on their profile information.
For a group chat or channel, External will be listed next to the name of any participants who are not a part of the account.